
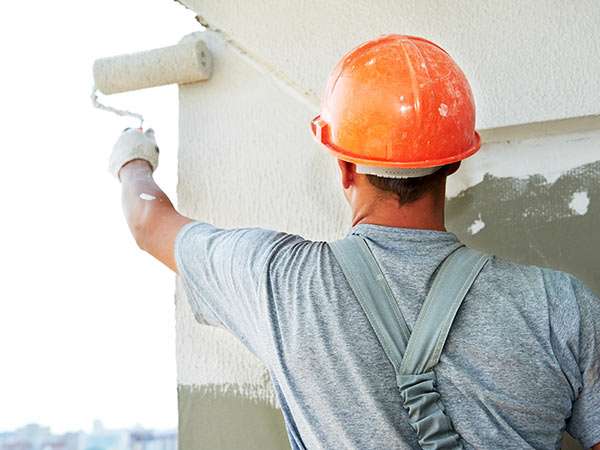
Painting render gives a long-lasting finish when the render is fully cured, dry, clean and sound, and when the coating suits the wall’s condition. Most failures on rendered walls come from painting too soon, painting over salts or moisture, or using a rigid paint over cracks that keep moving. Get those right and a rendered wall can hold its colour for many years.
Why does paint fail on rendered walls?
Render is cement, sand and lime, and it behaves very differently from timber. It’s alkaline when new, porous, and it holds moisture. Paint on render usually fails for one of these reasons:
- Painting before the render has cured. Fresh render is wet and highly alkaline, which can damage the paint film.
- Moisture moving through the wall. Rising damp, leaking gutters or garden beds against the wall push water and salts out through the paint.
- Salts on the surface. White deposits stop paint bonding.
- Cracks that move. Render cracks as the building settles and with temperature changes, and a rigid paint film cracks with it.
- Chalky old coatings. New paint can’t grip a powdery surface.
If you’re seeing these problems on a house with both render and timber, our guide to painting weatherboard houses covers the timber side of the job.
How long should new render cure before painting?
New render needs time to cure and dry before it is coated. Dulux’s guidance for its Texture Full Cover product is that new concrete, mortar or cement render must be allowed to cure for four to eight weeks, depending on thickness and drying conditions. Cold, damp weather pushes that towards the longer end.
Some systems shorten the wait by using a specialist sealer designed for fresh render, but they still depend on the surface being dry enough. Always follow the data sheet for the specific product.
Moisture is the real test. Dulux advises you avoid painting damp masonry with a moisture reading above 10% on a standard moisture meter. Painters check this with a meter rather than going by how the wall looks.
This matters most on new homes and extensions, where the painting schedule is often under pressure. If you’re building, factor curing time into the program. Our new construction painting team plans around it.
How to prepare a rendered wall for painting
Clean it
Wash off dirt, cobwebs and mould. Treat any mould with a suitable wash and let the wall dry fully. Dulux notes that efflorescence or mould must be treated before application of paint.
Deal with efflorescence
Efflorescence is the crusty white salt that appears on masonry as moisture carries minerals to the surface and evaporates. Dulux’s advice is to:
- Find and stop the moisture source first. Dulux says affected surfaces must not be repainted until the source of the moisture is identified and eliminated or blocked.
- Dry brush the salts off with a stiff bristle brush.
- Wet sponge the surface with a mild vinegar solution of about 5%, wipe with a damp cloth and let it dry thoroughly.
- Strip any paint the salts have damaged, then seal with an alkali-resistant sealer before topcoats.
Painting over efflorescence without fixing the water problem only traps the salts, and they will push the new paint off.
Repair cracks
Look at every crack before deciding what to do with it:
- Hairline cracks (fine surface cracks) can usually be filled and then bridged by a flexible coating.
- Wider cracks need raking out, filling with a flexible masonry filler and sanding flush.
- Cracks that are growing, stepping through brickwork or wider at one end can be a sign of structural movement. Get advice before you paint over them.
Treat chalky or drummy areas
Rub your hand across old paint. If it comes away white, the surface is chalking and needs to be cleaned back and sealed with a binding primer. Tap the render too. A hollow or “drummy” sound means the render has come away from the wall behind and needs repairing before any coating.
Paint, texture or membrane: which finish suits your render?
There are three main coating types for render, and the right one depends on the wall’s condition.
| Coating | What it is | Best for | Things to know |
|---|---|---|---|
| Exterior acrylic masonry paint | Standard 100% acrylic wall paint | Sound render with few cracks | Shows surface flaws and won’t bridge moving cracks |
| Texture coating | Thicker acrylic that leaves a textured finish | Patchy or repaired render, or a change of texture | Covers small holes and imperfections, uses more product |
| Elastomeric membrane | Flexible, high-build coating | Render with recurring hairline cracks | Dulux says its Acratex membranes are designed to bridge and minimise the look of masonry cracks while keeping water out |
Membranes are also designed to let masonry breathe, which matters on walls that hold moisture. That’s why choosing between a membrane and a standard paint should come after an inspection, not before.
Colour affects render too. Dark colours absorb more heat, which can make the surface move more. If you’re considering a dark rendered facade, a colour consultation can help you find shades that look right and suit the coating system. Our guide to choosing exterior house colours in Melbourne is a good starting point.
When is the best time to paint render in Melbourne?
Render needs to be dry, and the paint needs mild conditions to dry properly. Avoid painting render:
- after a run of wet weather, when the wall is still holding moisture
- in direct hot sun, which dries the paint too fast and can leave lap marks
- late in the afternoon, when dew can settle before the paint has dried
Check the minimum temperature on the tin for the product you’re using. Our article on the best time of year to paint your house exterior in Melbourne explains how the seasons affect exterior work.
Should you DIY or hire a painter for render?
A small rendered garden wall or letterbox pier in good condition is a fair DIY job. Clean it, seal it and apply two coats of a quality masonry paint.
Whole-house render is harder. It usually involves height, moisture testing, crack repair and choosing between paint, texture and membrane systems. AMP Master Painters has painted Melbourne homes since 1998 and works with premium Dulux, Taubmans and Wattyl systems. Our exterior painting service starts with a free site inspection, where we check the render’s condition before recommending a coating. You can read more about how we work on our process page.
If your render is already showing peeling or bubbling, our guide to peeling, cracking and blistering paint will help you work out why.
The bottom line
Painting render is mostly about what happens before the paint goes on. Let new render cure, make sure the wall is dry, fix the source of any salts, repair cracks properly and clean back chalky surfaces. Then choose a coating that matches the wall: a quality masonry paint for sound render, a texture for patchy surfaces, or a flexible membrane where hairline cracks keep coming back.